
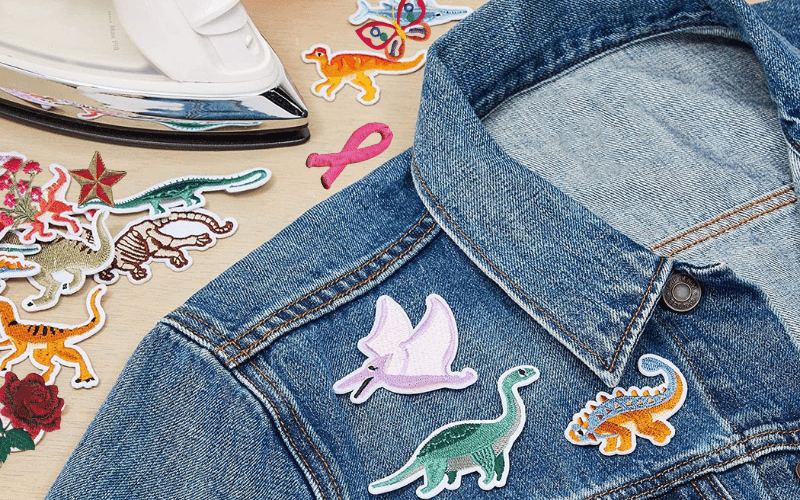
Iron-on patches are a great way to customise clothing, bags, and accessories. They add personality to everyday items and quickly fix torn fabric. However, when fashion trends change, or if a patch begins to peel, you may want to remove it without leaving damage or residue. Fortunately, there are multiple methods for how to remove iron on patches while preserving the quality of your fabric.
This guide will walk you through different techniques for effectively removing iron-on patches. Whether you are working with cotton, denim, polyester, or other materials, these methods will help you restore your fabric without a trace of the old patch.
Understanding the Adhesive Used in Iron-On Patches
Before removing an iron-on patch, it is important to understand the type of adhesive used. Most iron-on patches rely on heat-activated glue that bonds with the fabric fibres. Over time, the adhesive may harden, making removal a bit challenging. By knowing how to remove iron on patches, you can choose the most effective method without risking damaging your fabric. The difficulty of removal depends on several factors, including:
- The type of fabric the patch is attached to.
- How long has the patch been in place?
- The quality of the adhesive.
- The number of times the fabric has been washed and dried after applying the patch.
Methods for Removing Iron-On Patches
Removing an iron-on patch requires the right approach to avoid damaging the fabric. Whether using heat, steam, or chemical solutions, each method is designed for specific materials and adhesives. Here are the most effective techniques for how to remove iron on patches safely and efficiently remove iron-on patches.
Heat Application: Iron or Hairdryer
Reapplying heat is one of the most effective ways to loosen an iron-on patch adhesive. Use an iron on a low heat setting or a hairdryer to warm the patch. Once the glue softens, gently peel off the patch with tweezers or a knife to avoid damaging the fabric.
Freeze and Peel: The Cold Removal Trick
If using heat isn’t an option, freezing is a great alternative. Place the fabric in a plastic bag and freeze it for a few hours. The extreme cold makes the adhesive brittle, allowing you to crack and carefully peel the patch away with minimal residue.
Solvent Solutions: Breaking Down the Adhesive
For stubborn patches, adhesive removers like Goo Gone, rubbing alcohol, or acetone-based nail polish removers can break down the glue. Understand how to remove iron on patches and apply a small amount to the edges of the patch, let it sit for a few minutes, and then gently lift it off without stretching the fabric.
You Might Also Like: How To Convert A USB Into A Portable Gaming Console
Steam Power: Gentle and Effective Removal
Steam can weaken the adhesive without exposing delicate fabrics to direct heat. Hold a garment steamer or steam iron close to the patch and let the steam penetrate the fabric. Once the glue softens, slowly peel away the patch without leaving excess residue.
Step-by-Step Guide for Each Method
Once you’ve chosen a removal method for how to remove iron on patches, following the right steps ensures a smooth process without damaging your fabric. Whether using heat, freezing, or solvents, carefully executing each step will help you remove the patch effectively while keeping your garment intact.
Using Heat (Iron or Hairdryer)
To remove an iron-on patch using heat, start by setting your iron to medium heat (without steam) or using a high-heat setting on your hairdryer. Place a thin cloth or parchment paper over the patch to protect the fabric, then apply heat for 30–60 seconds until the adhesive softens.
Once the glue loosens, use tweezers or a butter knife to lift one corner of the patch and gently peel it off while applying heat. If any residue remains, reheat the area and carefully scrape off the excess adhesive for a clean finish.
Freezing Method To Remove Iron On Patches
To remove an iron-on patch using the freezing method, place the fabric with the patch inside a plastic bag and put it in the freezer for at least 3–4 hours. Once frozen, remove the fabric and gently bend the patch to weaken the adhesive. Use a blunt knife or tweezers to carefully lift and peel off the patch. If any residue remains, repeat how to remove iron on patches until the patch is entirely removed.
Using Adhesive Removers or Solvents
To remove an iron-on patch using adhesive removers, apply a small amount of Goo Gone, rubbing alcohol, or acetone to a cotton ball or cloth. Gently dab the solution onto the patch’s edges and let it sit for a few minutes to break down the adhesive. Once the glue weakens, use tweezers to peel off the patch carefully. Finally, remove any remaining residue with more adhesive remover for a clean finish.
Steam Removal Method
After learning how to remove iron on patches using steam, hold a garment steamer or steam iron close to the patch without direct contact, allowing the steam to penetrate for about 30 seconds. Once the adhesive softens, use tweezers to lift the patch’s edges while applying steam gently. Slowly peel it off, ensuring the glue loosens evenly. Finally, wipe away any remaining residue with a damp cloth for a clean finish.
Removing Residual Adhesive
Once the patch is removed after learning how to remove iron on patches, lingering adhesive can leave the fabric feeling rough or sticky. To remove it, apply heat, rubbing alcohol, or adhesive removers to break down the residue. Gently scrub with a cloth or use a dull knife to lift any stubborn glue, restoring the fabric’s smooth texture.
Household Solutions for Residue Removal
- Rubbing Alcohol: Apply with a cotton ball and rub the area gently.
- White Vinegar: Mix with warm water and scrub lightly with a cloth.
- Baking Soda Paste: Apply a paste of baking soda and water, let it sit, and then wipe off.
Commercial Adhesive Removers
After removing the adhesive, wash the fabric according to care instructions to ensure all residues are gone.
- Goo Gone
- WD-40
- Nail polish remover (acetone-based)
Tips for Avoiding Fabric Damage
Always test solvents or heat on a hidden area to prevent fabric damage while removing patches. Use low heat settings for delicate fabrics like silk or synthetics to avoid burns or melting. Avoid excessive scrubbing, as it can thin the fabric or cause discolouration. If using chemical removers, ensure proper ventilation to minimise exposure to fumes. Stay with us for more info on how to remove iron on patches!
Common Mistakes to Avoid While Removing Iron On Patches
- Overheating the fabric: Excessive heat can burn or discolour fabric.
- Using harsh chemicals on delicate materials: Acetone or alcohol can damage silk and synthetics.
- Ripping off the patch forcefully: This can stretch or tear the fabric.
- Skipping a patch test for solvents: Some removers may stain or weaken fibres.
- Not cleaning leftover adhesive properly: Sticky residues can attract dirt and damage clothing.
- Using dull tools for lifting the patch: A blunt knife or dull tweezers may cause fraying.
- Ignoring fabric care labels: Some fabrics require special handling to prevent damage.
Frequently Asked Questions
Can I Remove An Iron-On Patch Without Damaging The Fabric?
Yes! Methods like heat, freezing, or adhesive removers help remove patches safely without harming the fabric.
What Is The Easiest Way To Remove An Iron-On Patch?
Using an iron or hairdryer to reheat the adhesive makes peeling off the patch easy and effective.
Will Freezing A Patch Help Remove It?
Yes, freezing makes the adhesive brittle, allowing you to crack and peel off the patch easily.
Conclusion
Learning how to remove iron on patches doesn’t have to be frustrating. You can safely detach a patch without damaging your fabric with the right approach and tools. Whether using heat, cold, solvents, or steam, each method effectively solves different situations. Following these steps will help keep your garments clean and fresh, ready for new designs or a patch-free look.


