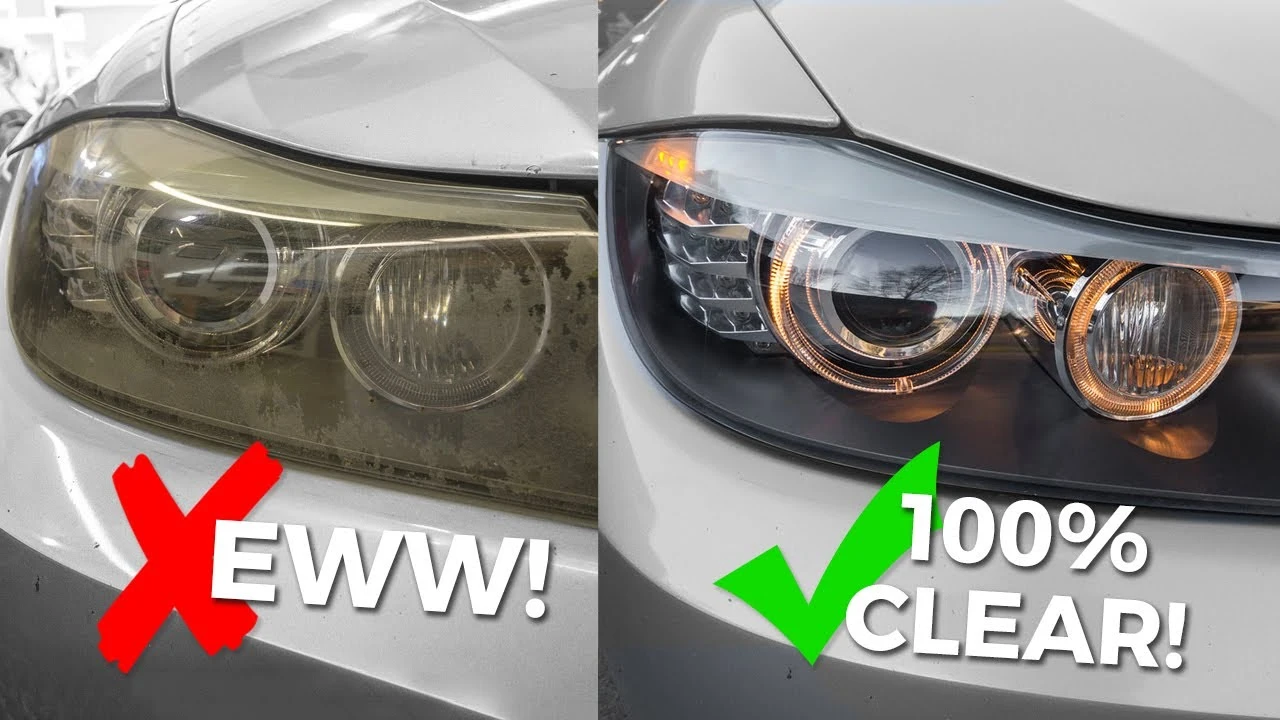
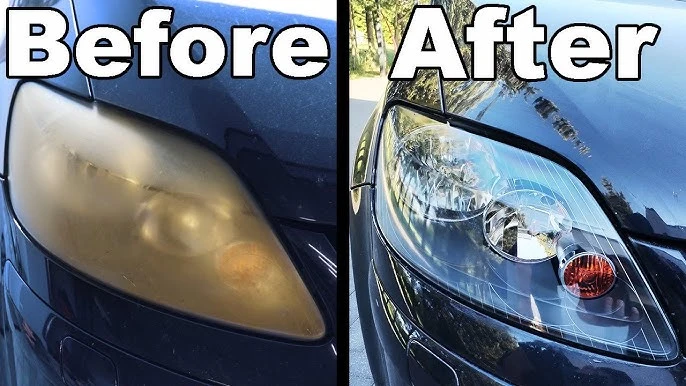
The effectiveness of driving safely depends on headlights which become essential when driving at night or in conditions with bad weather. Regular exposure contributes to lens degradation that causes yellowing which leads to clouding and finally results in a foggy condition that reduces both visibility and performance. Multiple conditions such as UV ray exposure, road salts and dirt, and environmental pollution result in yellow discolouration. The oxidation process of the plastic headlight surface produces yellowish discolourations. Stay with us for a better understanding of How To Clean Yellowed Headlights!
The replacement does not need to be expensive because this issue can be fixed. A small homemade kit or an inexpensive commercial restoration kit enables quick restoration of headlights to their clear and bright condition. The following guide demonstrates the complete process of treating yellowed headlights alongside strategies to prevent further damage while enhancing vehicle visibility when driving. You will discover simple solutions here that suit both home DIY drivers and those who need fast responses because these methods restore headlights to their original bright condition.
Essential Tools And Products For Restoring Your Headlights
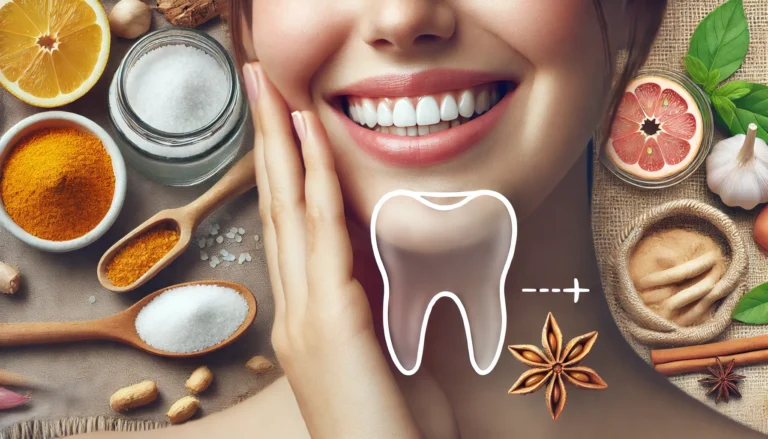
The first step in headlight restoration is to acquire the necessary equipment and supplies. You need not run to professional services because many efficient solutions exist in household items and affordable commercial products. An easy solution for How To Clean Yellowed Headlights requires only toothpaste because this product includes gentle abrasives that can effectively erase yellowed coating from car lights.
Using toothpaste mixed with baking soda produces additional cleaning strength for headlight restoration. Vinegar, a common household ingredient, becomes a powerful paste when combined with baking soda to eliminate oxidation. Users seeking advanced headlight restoration results should choose a commercial restoration kit from the market. The kits come complete with essential components such as sandpaper polishing compounds and UV sealants to provide an expert-looking outcome.
Several grades of wet/dry sandpapers will become your best friend for soft oxidation removal when you face hard-to-remove headlights. To avoid scratches on the surface, use either a microfiber cloth or a soft sponge while applying and buffing the solution over the surface. A water-filled spray bottle will help you prepare sandpaper before use and will let you remove excess residue. These simple pieces of equipment for How To Clean Yellowed Headlights set you up to revitalize headlights and enhance their appearance and efficiency.
Easy Methods To Make Your Headlights Shine Like New
You need not worry about your dim headlights since there are multiple accessible restoration solutions. Various economical approaches exist to revive your headlights to their previous state. Toothpaste, baking soda, and light solutions work together to transform faded headlights, whether they display a slight haze or extensive yellowing.
How To Clean Yellowed Headlights By Using Toothpaste & Baking Soda
One of the easiest and most budget-friendly ways to understand and restore How To Clean Yellowed Headlight is by using toothpaste and baking soda. This powerful combination works due to the mild abrasives in both ingredients, which help scrub away oxidation and grime without damaging the plastic lens. Simply apply a small amount of toothpaste to the headlight surface, then sprinkle baking soda over it. Use a soft cloth or an old toothbrush to gently scrub in circular motions.
You’ll want to apply consistent pressure, but be careful not to overdo it to avoid scratching. After a few minutes of scrubbing, rinse the headlight with water and wipe away any residue with a clean cloth. Repeat the process of understanding How To Clean Yellowed Headlights if necessary until you see a noticeable difference. This method is ideal for headlights with moderate yellowing or cloudiness. It is a great starting point for anyone looking to restore their headlights quickly without spending money on specialized products.
Headlight Restoration Kits – Your Shortcut To Crystal-Clear Lights
Headlight restoration kits are a game-changer for a more thorough and professional-grade cleaning. These kits typically contain everything you need, including sandpaper, polishing compounds, and a UV sealant. Most kits include detailed instructions, making the process easy to follow, even for beginners. First, you’ll use the sandpaper to gently sand away the oxidized layer of the plastic, usually starting with a coarser grit and working your way to a finer one.
Once the oxidation is removed, a polishing compound is applied to restore clarity and shine. Finally, the included UV sealant protects the headlights from future damage and prevents yellowing from returning. This method is perfect for headlights with significant cloudiness or yellowing, as it offers a more permanent solution than DIY hacks. If you’re looking for a reliable, long-lasting result, investing in a headlight restoration kit is well worth it.
Sandpaper Magic – The Secret To Fixing Severely Yellowed Headlights
When your headlights are extremely yellowed or foggy, sandpaper can be a lifesaver. Learn the methods of How To Clean Yellowed Headlights involves wet sanding, which uses progressively finer grits of sandpaper to remove oxidation layers, bringing the headlight back to a more precise, transparent state. Start by using a coarse grit (around 600 grit) to gently sand away the top layer of oxidation, being careful to keep the surface moist to avoid scratches. Once the yellowing is gone, switch to finer grits (1000, 1500, and 2000 grit) to smooth out the surface and ensure it’s as straightforward as possible.
After sanding, apply a polishing compound to buff the headlight to a glossy finish. Working slowly and patiently during this process is important, as over-sanding can cause more damage. This method is ideal for heavily yellowed headlights that require a deep clean. Though it may take more time and effort, sandpaper provides excellent results when understood and used correctly How To Clean Yellowed Headlights and leaves your headlights looking brand new.
Frequently Asked Questions
Can I Clean Yellowed Headlights With Household Items?
Daily household items like toothpaste, baking soda, and vinegar can restore yellowed headlights.
How Long Does It Take To Clean Yellowed Headlights?
Depending on your chosen method, cleaning yellowed headlights can take 15 minutes to an hour.
Will Cleaning My Headlights Prevent Them From Yellowing Again?
Cleaning alone won’t stop headlights from yellowing in the future, but applying a UV sealant after cleaning can help protect the headlights from UV damage and slow down the yellowing process.
Conclusion
Learning How To Clean Yellowed Headlights not only makes your car look older but also poses a safety risk by reducing visibility on the road. Thankfully, restoring them to their clear, bright state is easier than you might think. Whether you choose a simple DIY method like toothpaste and baking soda, opt for a professional-grade headlight restoration kit, or use the sandpaper technique for severe damage, you can bring your headlights back to life with minimal effort and cost. By following the steps in this guide, you’ll improve your vehicle’s appearance, enhance your driving safety, and save money by avoiding costly headlight replacements. Keep your headlights shining bright, and drive with confidence!